Sunday, February 26, 2012

DIY Display Frame


I love etsy.  What a great site for artists to go and make their beautiful pieces accessible to folks around the globe.  I embarked on my etsy page a few years ago and was thrilled with the results.  I kind of took a break from my store over the past year.  After the third baby things got, well....a little cray-cray around here.  Third baby is now 2 so things have slowed down a little bit.  Who am I kidding?  They haven't slowed down, they've sped up!  Maybe we've just gotten better at managing everything.

Now that things have gotten a little more manageable I've started to sew and create things again.  Recently I've started upcycling clothing items into flower headbands.  I started out making them for baby girl.  But, as I was making the headbands I had enough fabric leftover to make more.  So, I decided that I'd start up the ole' etsy store once again!  

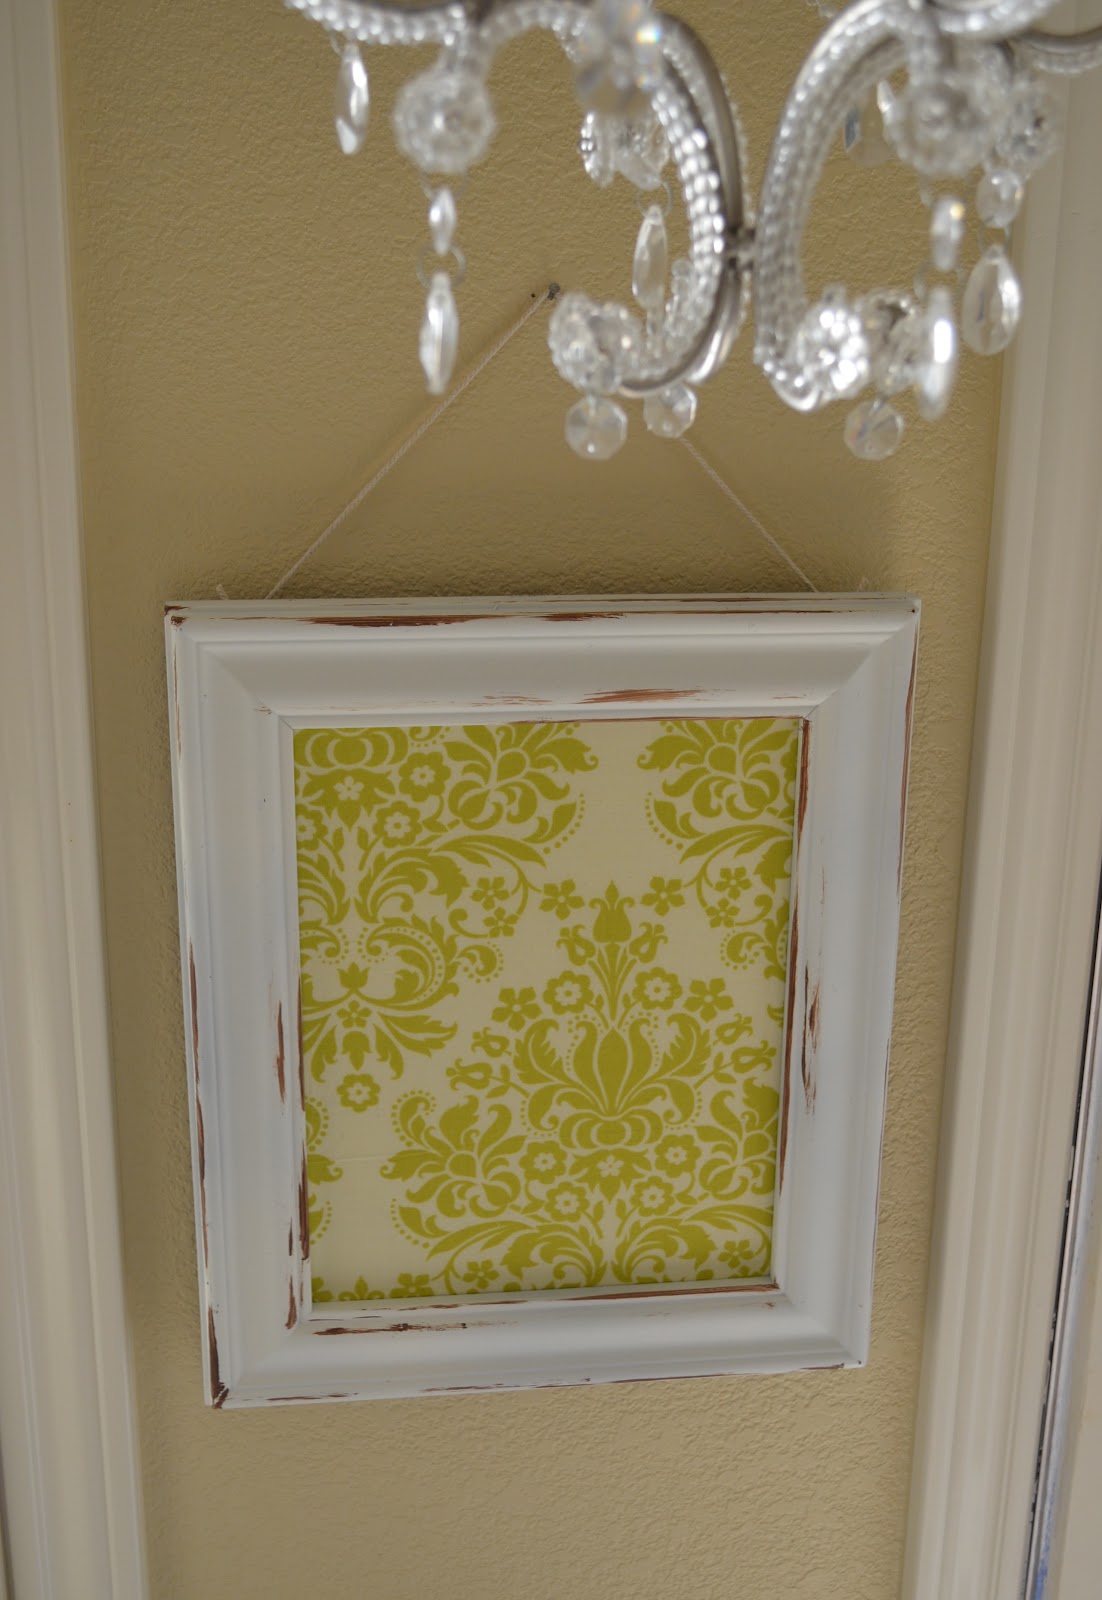
I wanted a cute way to display my Therapy creations.  I knew what I wanted, and had an idea in mind.  All I needed were some upcycling items to make it happen.  One old frame, a blank canvas and some paint later and voila!  I had a new display board to really help my pieces stand out.  I am going to make more of these and just hang them up as artwork.  The options are endless as far as theme and colors go.  Here are the tools and steps to create your own.   


Supplies:

Old frame
Spray paint
Canvas
Fabric
Hot glue gun 
Staple gun
Dark paint for antiqued effect
Paint sponge or brush 


Construction:

1. Spray paint old frame till desired color is reached

2. To add antiqued effect lightly dab your sponge or brush into your darker contrasting paint.  Gently brush small strokes on the frame on corners and edges of until antiqued look is achieved.  Go slow and press lightly.  You can always go back and add more.


3.  Cover your canvas with desired fabric or paint by either gluing or stapling back of canvas


4.  In order to keep canvas in place, cover the back with something that will hold it in.  I used a piece of inexpensive muslin.  You could even use paper or a paper grocery sack.  The thicker the paper the better (at Hobby Lobby they use paper to hold in a canvas).


5. Attach hanging wire, twine, or ribbon to back of frame.  If your frame does not have hangers you can easily add them.  You can find frame hangers at any home improvement store, Hobby Lobby, Michael's, etc.


6.  Hang your beautiful creation and enjoy!


Saturday, February 25, 2012

All That Glitters! DIY Sequin Heels

What could make a pair of basic black slingback peep toe pumps any better?  Um.  Glitter.  That's what.

Over the past few years I've successfully started losing the ole' baby weight.  There is only one downside to all that.  My feet have shrunk and my shoes, my lovely-lovely shoes, do not fit anymore.  The good thing about it is that not only am I losing weight I'm also getting to replace the lovely-lovely shoes with other lovely-lovely shoes!

The one pair I was so sad to see go were these beautiful black slingback peep toe pumps that I could wear with everything.  I searched and searched for a replacement pair with no luck.  Finally one day I found a Nine West pair for $25 at Ross.  The only thing was that they were patent and I'm not a big lover of patent shoes.  As most things go I soon found another pair of black peep toes that were satin.  I snagged those up instantly and was left with the patent ones.  I wasn't really sure what to do with them and so I just hung on to them.


This weekend I thought I'd spruce 'em up a bit and give them a little shine.  Here is the inspiration, the sprucing I did, and how I did it.

The inspiration, Christian Louboutin Lady Glitter Slingback


My creation.  At first I did just the heal.


I loved the heel so much I did the whole heel, and then the front platform.

Supplies:


- Heels that need sprucin'
- Glitter
- Mod Podge
- Sponge or brush
- Tape (painters tape is best)
- Shoe box to catch glitter

Construction:

1.  Wipe down heels and make sure they are clean and dry

2. Tape off parts of shoe that you do not want to glitter


3.  Brush on mod podge on areas you want glittered


4. Sprinkle glitter on mod podge 


5. Hang shoes for first coat to dry

6. Let first coat dry for at least an hour. I think I may have even left them for 2 just to be sure

7. To rid of loose glitter take shoes outside and either put them on and gently stomp around a bit or tap shoes on hard ground.  Be careful not to ruin shoes!


8. Apply second coat, repeat process

9. Step back and enjoy your beautiful creation!


Before


After

Now....what to do about the soles of the shoes.  I'm thinking hot pink.

Monday, February 20, 2012

DIY Studded Denim Jacket


The inspiration.  Kate Moss in Burberry
Me in my creation
The denim jacket.  An american staple as far as I'm concerned.  We loved them in the 80's, we love them in the 2012.  Timeless, dependable, functional, versatile.  They're also a fabulous canvas to add studs, rhinestones, paint, or whatever your bling of choice is.


We've all had our fair share of a stylish denim jacket.  There were the acid washed, the wool lined, and one of my favorites the white denim jacket.  Once as a fifth grader I was walking through a 5-7-9 store (you know, that store where they only carry sizes 5, 7, and 9).  As I browsed through the endless parade of colored bangles, cut off shorts, and midriff shirts I stumbled upon this awesome acid washed denim jacket!  It was meant to be worn big and baggy (why that seemed appealing to me I will never-ever know), and I coveted that thing until about the 7th grade when I decided to just let it go.

About 10 years ago I rediscovered my love for the denim jacket.  I was in a Forever 21 store in Austin and came across one.  All of a sudden I was that curly haired fifth grade girl with bangs again.  But this time there would be no sleepless nights over the denim jacket that got away.  I bought it.

I wore that thing all through college until about 5 years ago when I went in search of one that fit a little better and wasn't so um- snug.  One of my favorite go-to stores is American Eagle.  I absolutely love their denim, sun dresses, and endless clearance racks.  As I walked by one day I noticed a sales girl pushing a hanging rack of denim jackets.  I quickly scooted in and found one in my size!  I've been sporting said jacket now for a few years.  As much as I love my denim jacket I was ready to add a little pizzaz  to it.

Here are the inspiration pieces by Givenchy and Burberry, how I did my jacket, and the steps to create your own.  Happy studding!

Burberry
Givenchy
Givenchy

Supplies:


Jacket; denim, leather, jersey, whatever floats your boat
Studs
Jewelry pliers


So, I stumbled upon like the coolest thing ever.  I went in search of packaged silver studs as I had done before but was unable to find them.  I was determined to find something that would work.  But, I didn't want the iron on studs.  I wanted the ones with the little teeth.  I thought I'd try the trim isle and just see what they had.  Lo and behold, it was like someone had read my diary, there was studded trim on a bolt that you could purchase by the yard!  AND, it was 40% off!  But seriously.  Who read my diary?

I recently found an awesome site where you can find studs at fantastic prices.  Studs and Spikes has just about every type of stud detail you can think of.  I'll be going here next time around.


This is what is left of the vinyl after the studs are detached.  Wonder what I'll make with this.

Construction:

1.  Carefully remove studs from strap by opening back teeth and pulling off with pliers.

2.  Begin to apply studs by pushing them through your fabric.

3.  Secure studs to item by pushing teeth together on inside of fabric.  

4.  Be sure to push teeth all the way down.  If you do not they may scratch skin or snag clothing.

5.  Enjoy your studdliness!

I just did the side of both arms.  But, I"m seriously thinking of studding the collar too.


Wednesday, February 15, 2012

DIY T-Shirt Headband

It was around week two of recovering from my tonsillectomy that I had finally had enough of sitting still.  I knew that I could not start any new projects that were going to be to intensive and I knew I had to still take it relatively easy.  I had been wanting to make Miss Micaela a few little headbands.  So, I played around with some jersey knit that I had, but it was looking a little bulky.  I decided that in order to stick with my new profound sense of upcycling that I would track down items that I was no longer using and would Cut. Them. Up.  I went into my closet and decided to reuse old t-shirts that I was not ever going to wear again. T-shirts from spring break's past and shirts that I'd been hanging onto for one reason or another.  And, I must say that cutting and tearing into t-shirts after being bed ridden for two weeks was awesome.  It was Therapy many times over!

I encourage you to clean out the closet, reuse fabrics you have.  Don't stop with t-shirts.  You can reuse scarves, belts, jackets, shoes, and on and on.  You'd be surprised what great colors and fabrics you can make things out of if you just look to what you have.  Get to cuttin' up!  I'm looking forward to sporting a few of these myself!


T-shirt hot pink headband.


Before


Try to use fabrics that have stretch to them.  This will give the wearer longer use.


Black tulle and pearls were added to this one.


Supplies:


Construction:

1. For headband, measure from top of forehead to back of head (top of neck).  Add about an inch for sewing.

2. Decide how wide you want your headband, then double it or fold fabric in half.  You will be sewing two headband pieces together.  My headbands were around 2"-3".  If you make them too thick it is a little harder for tiny heads to keep them on.  

3.  Cut two headband pieces of the same size based on your measurements.

4.  Sew two pieces right side together, leaving ends open for turning.  If you sew the ends this will add bulk to back of headband.

5. Sew ends of headband together to form full circle. Try on headband and then trim access fabric.

6.  Cut pieces for flowers.  I will be posting a tutorial on how I made mine very soon.  But, in the meantime there are tons of tutorials online.  

7.  Sew your flowers.  In order to add dimension and interest, make your flowers all different sizes.

8.  Hot glue or sew on rhinestones, pearls, beads, etc.

9. Hot glue or sew your flowers onto headband.

10. Wear and enjoy! 


This headband is something baby girl wears almost daily.  We have lots of pink outfits!  I added rhinestones to the center of the flowers.

Sunday, February 12, 2012

PJ's and Pancakes Party! Baby Girl Turns Two!

This is a wreath covered with linen strips tied in double knots.  It is showcasing Miss Micaela's big day with her initial and happy birthday written on the chalkboard.  This sign is great for any occasion.

Friday, February 12, 2012.  Our live's changed forever on that day as our baby girl came into this world.  Micaela Elisabeth has filled our family with so much joy, laughter, and PINK!  After two boys we were ready for a little girl.  But, nothing could have prepared us for how in love we were about to fall with this sweet little girl we now call "Tinker".

Little Miss Tink is a girly girl.  She likes clothes, jewelry, shoes, bows, baby dolls, and food.  Lots of food.  What better way to celebrate her 2nd birthday than with a laid back PJ's and Pancakes birthday party?  Complete with pancakes, sausage, biscuits, and lots and lots of pink!

The first thing I always do for the kids' parties is decorate over our island.  It is where we always have the food buffet and cake on display.  Here are some pics of what I did decoration wise.  I absolutely love these tissue pom-poms that you can pick up at party stores, Michael's, or Hobby Lobby.  I've seen tutorials where you can make them.  But, these were inexpensive and not near as much work.


This was the set up for the food.  We had pancakes, fruit toppers, biscuits, gravy, and of course mimosas.


I made this Happy Birthday sign out of graphic card stock and letters that I traced on paper and then cut out, then I glued the flags to the ribbon.  This is a sign I will use again and again.  And, I just love it because it is so girly and shabby chic.


Little Miss Tinker in her silk pj's on her 2nd birthday.


We opted out of doing a cake and decided to stick with the theme and do a little short stack on a cute platter with two candles.  It was precious and so convenient!  


Mommy and her baby girl.

My sis Val and I.

My sweet husband Jim is such a sport when we do our little themed parties.  I don't know who has more fun, us or him!  

Daddy and Tinker.  I found her jammies that came with a matching set for her baby doll.