Tuesday, September 25, 2012

"Fall"ing In Love...

Fall is in the air!  This is my absolute most favorite time of year.  There is nothing like it. There's a crisp cool feeling in the air, the boots are coming out, scarves, football- sweet football, pumpkins, soups, hot tea, and lots and lots of holiday cheer on the horizon!

I could not wait to get my fall mantels put together.  I vowed this year to make a Give Thanks glitter sign, put to good use those tree branches laying around our alley, and use as many white pumpkins as I can get my hands on.  Here are some picks of our fall mantels.

Living room mantel, reminding us to give thanks for all of our blessings...


I took tree branches I found in our alley and sprayed them with glue adhesive, then sprinkled them with gold and silver glitter.  I'm absolutely in love with the result!  It gave the decorations some added sparkle and lots of height.  And, best of all it cost maybe $5.


A little glue adhesive and some glitter later you have a beautiful shimmery centerpiece.  Great way to add height and shine.  Looks gorgeous once you light some candles or christmas lights around them too.


I also used the glue adhesive and glitter on these cardboard letters I found at Hobby Lobby, then strung them together with twine for our Give Thanks banner.


Here is the dining room side:

Took the topiaries from the living room and added white pumpkins and glittered acorns.


Happy Fall!

The end...


Monday, September 24, 2012

Apple Pickin' Fun!


Apple Orchard!  Today we went on our first field trip as All Saints Patriots!  I had such a fun time with my lil' guy.  We picked apples, went on a hayride, tried cider, and had lots of fun with friends!


Will and friend.


Hayride!

Apple pickin...


A nice drink of cider to cool down after running around apple pickin'!

The end...

Monday, September 17, 2012

I'm officially a soccer mom!  I've been a baseball mom, football, basketball, and track mom.  But, never a soccer mom.  Now, thanks to our little Will Pie I finally get to add soccer to that list!  Saturday was the Killer Bee's first game.  The boys did great and Mr. W even scored a few goals!  Here are a few pics of how we spent our Saturday.


William all suited up!

Where brother goes...little sister goes too.
This is one of her little Killer Bee cheerleader outfits.


Sister taking a break from all the cheering.

 Daddy practicing with the Bees.

So proud of our lil' guy!


Lil' sister was so tired from all the excitement.

William gets the ball!

The end...

Tuesday, July 3, 2012

Under"stud"y


Hello.  My name is Marci and I am a shoe addict.

I say that to say this:  I love shoes.  I love them all.  I love boots, flats, strappies, heels, peep toes, and especially wedges.  I have goodness knows how many pairs in my closet.  If there is a cute wedge under 5" you better believe I probably have them.  I say under 5", because I wont wear anything over 5".  I feel tall and lanky after 5" and I just can't deal with it.  Which is funny because I'm only 5 feet tall.  Anyway...

Along with my new outlook on upcycling I decided that I would do something with all of the wedges that are pilling up in the ole' closet.  Here's a little look at what I came up with and the inspiration behind my new venture as an under"stud"y.

My creation:


One day while feeding my addiction for beautiful footwear I came across these gorgeous Vince Camuto Studded Wedges.  

To my chagrin not only were they $100, but they were also sold out.  I got to thinkin....surely I have something similar in my closet of shoe wonder that I can convert into a studded wedge.  I scurried on home and much to my delight I found these in my closet! 

A pair of Fergalicious brand wedges.  Cute, but just so-so.


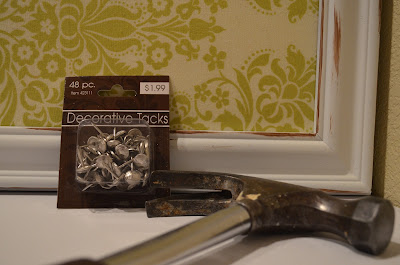
Some furniture studs from Hobby Lobby, a hammer, and a few minutes later I had a new pair of shoes!


The final masterpiece!

To create your own just simply map out your design with a ruler and pencil, or wing-it like I did.  Patience is a virtue I have not successfully mastered.  Lightly poke end of stud into shoe and begin gently hammering into place.  For added stud security put a dab of a good, strong glue on the end of stud before pushing in.

Continue process until you reach desired design!


Next, I want to try painting some wedge heels turquoise and then studding them!
Happy studding!


The end...

Tuesday, June 26, 2012

Going to new lengths...The Maxi Micaela Dress from Therapy

After a few weeks off I had a burst of inspiration!  I literally woke up at 5 am from a dream where I was making the Micaela Dress into a longer maxi dress.  I made a prototype, took it on vacay, and I can honestly say it is one of my top 2 favorites!

It is so comfortable and breezy, and looks fabulous with big earrings, bangles, and flat strappy sandals.  I am in love with this dress.  Planning on bringing some prints to this pattern that I think will look lovely.

Here's a peek:

The Micaela Maxi Dress


I usually move my side tie to the back, if my hair is down.  But, you can wear it either way.


Don't normally show works in progress, but this is a dress I am working on now.  It is a gorgeous bright colored zigzag print, also jersey stretch.  Love, love, love this happy pattern!


 Just need to finish up hems and add necktie!


The little girl that inspired the Micaela Dress, Miss Micaela herself...


...and my beautiful baby boy, William...


The End.

Saturday, June 2, 2012

Let's go camping! (Backyard camping that is)

Took a little break from work today and decided to make a backyard tent for the babies!  This was a pretty simple task.  Just some rope, two trees, a couple yards of fabric, tent anchors, some pillow stuffing, and voila!  We had ourselves a backyard tent!  
And, a new favorite place to have dessert in the evening.

I made our tent from a bolt of fabric that I've had for years.  I was hanging on to it to do something special with.  I think this was the perfect time to use it!


I had enough fabric left to make a little blanket and matching pillows.


Had the hubby tie a long piece of rope between two trees to hang the tent over.  I sewed three loops on each side of the tent to hook anchors through.


Daddy and the babies enjoying the evening. 


Dub really liked sitting in it.


 This is the inside view looking up.  It's like real camping!


 Baby girl liked her new tent so much she wanted to take a nap.


 Backyard by candlelight...


Night night...